Body Recomp Before and After Photos: Week-by-Week Timeline (2026)
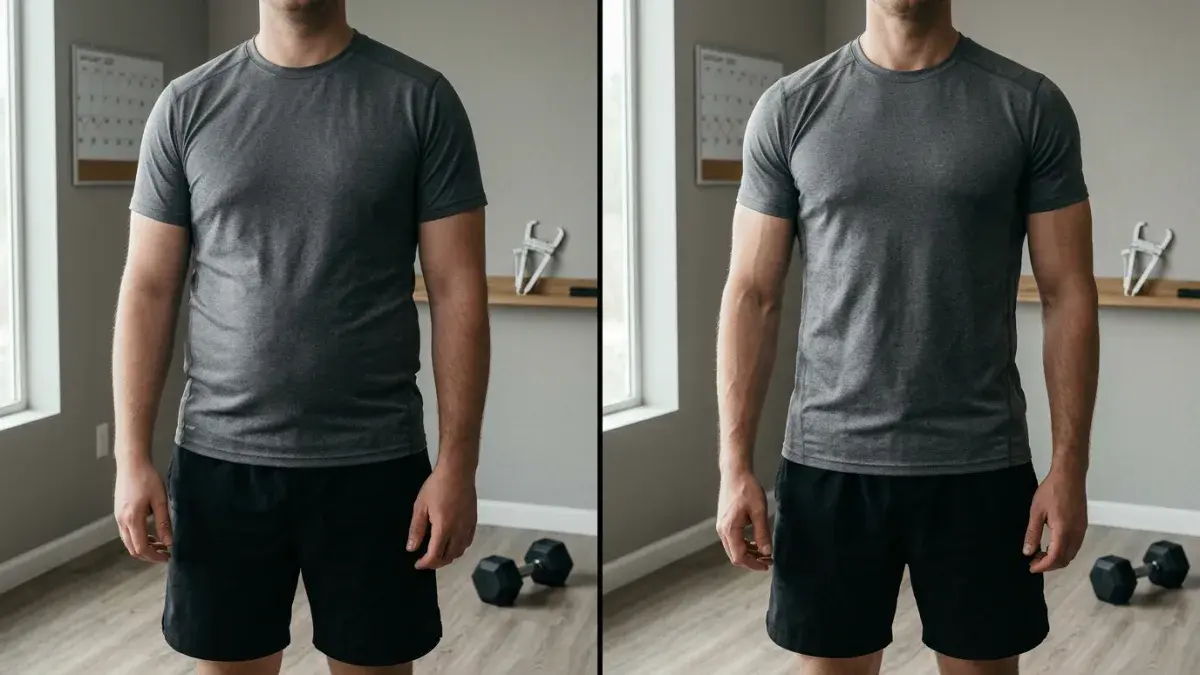
Progress photos are the most honest measurement tool during a body recomp, and also the easiest one to take badly. Recomposition specifically moves fat mass down and lean mass up while the scale barely moves — which means anyone running a recomp who relies on the scale alone will conclude, incorrectly, that nothing is happening. The photos are doing the actual reporting. The scale is a sanity check, not a verdict.
This article walks through what a real recomp timeline looks like in photos, week by week, from week 0 through week 24. It also covers the boring procedural rules — lighting, angle, time of day, hydration — that determine whether the photos are signal or noise. Plug your numbers into the body recomp calculator for the macro side and the body fat calculator for the numerical companion to your photos.
Why Recomp Photos Tell You What the Scale Hides
The classical scale-driven approach to body change works for cuts and bulks because in both, the scale and the body composition move in the same direction. Cut: scale down, fat down. Bulk: scale up, lean mass up. The scale is a usable proxy. Recomposition breaks this. You can lose 3 kg of fat, gain 2 kg of muscle, and net a 1 kg scale drop over 12 weeks. The scale shows you a trivial movement; the photos show a meaningfully different person.
Helms, Aragon & Fitschen 2014 (PMID 24092765) framed this clearly in their natural-bodybuilder review: in trained lifters running a controlled deficit with adequate protein and resistance training, scale change becomes a poor predictor of body-composition change because the two underlying variables are moving in opposition. The same paper recommended skinfold and photo tracking specifically for the recomp population. Two decades of natural-physique coaching practice has converged on the same answer.
The Photo Protocol: Lighting, Angle, Time, Hydration
Four variables determine whether your photos can be compared meaningfully across weeks. If any of these drift, the comparison becomes useless:
- Lighting: Use overhead, diffuse light from above. Direct side-lighting (a single lamp from one side) over-emphasizes definition; flat overhead light is honest. The same room, same time of day, same window state. Avoid mirrors with their own lighting bias.
- Angle: Camera at sternum height, perpendicular to your body. Phone tilted up shortens you and makes the abdominal region look slimmer. Phone tilted down lengthens you and makes everything look bigger. Tape a mark on the wall at sternum height and place the phone there every time.
- Time of day: Morning, fasted, post-bathroom, pre-water. This is the calmest hormonal and gastric state you experience. Evening photos have 2-4 cm more apparent waist circumference and look 4-6 lbs heavier even when nothing in your body composition has changed.
- Hydration and carbs: Take photos on a normal-eating day, not after a low-carb day (depletes glycogen, makes you look smaller and flatter) and not after a high-carb day (full glycogen, fuller-looking muscles). Two days of standard intake before every photo session.
The minimum useful photo set is three angles: front-relaxed, side-relaxed (left or right, pick one and stay consistent), back-relaxed. Some lifters add a front-flexed and back-flexed pair, which is fine but optional — the relaxed angles capture the body-composition signal more honestly because they remove the variable of pose intensity.
The Recomp Timeline: What Each Phase Looks Like
Week 0 — Baseline
The honest starting point. Take the photos before anything has changed — before the first training session, before the first day of the protein bump. Most lifters never re-take a baseline this clean, so over-document this one: front, side, back, plus a front-flexed and back-flexed pair. Weigh yourself, measure waist circumference at the navel, measure hip circumference at the widest point, and log all of it alongside the photos. The waist-to-hip ratio and waist circumference will move faster than the photo signal in weeks 1-4, so the measurements matter for the early-phase readout.
Week 4 — First Photo-Visible Change
Week 4 is the earliest milestone where the photos will show something. The change is subtle but real: waist circumference drops 1.5-2.5 cm, the obliques start to lose the soft halo, the deltoid origin becomes slightly more defined under good lighting. The training protocol from our recomp training split guide produces visible deltoid sharpening by week 4 in most beginners because the rear delts and lateral delts are underdeveloped in most adults and respond fast to even moderate volume.
The week-4 photo is also where the protein math starts to show. Lifters hitting the 2.2-2.6 g/kg lean-mass target from the recomp protein guide retain visibly more muscle in this phase than lifters under-eating protein. The visible difference is small but real — the obliques and the deltoid-trapezius region are the first places that show under-fed protein during a deficit, and the photo captures it.
Week 8 — The Compounding Phase
Week 8 is where the photo gap from week 0 becomes obvious to anyone looking at the two photos side by side, not just to you. Waist circumference is down 3-5 cm. The chest-to-waist ratio has improved measurably. The lower-abdominal region has lost a visible layer of soft tissue. The lats are wider in the back photo because the latissimus dorsi insertion at the iliac crest has become visible.
This is also the phase where lifters who started under-eating calories begin to plateau visually. The body has adjusted to the deficit, the metabolic rate has dropped 50-150 kcal/day in adaptive thermogenesis (per the body recomp math piece), and the same input no longer produces the same output. If your week-8 photo looks identical to your week-6 photo, this is the most common diagnosis.
Week 12 — The Beginner Finish Line
For a beginner starting at 20%+ body fat, week 12 is where a meaningful transformation is visible to friends and family without prompting. Waist circumference is down 5-8 cm. Body fat percentage has dropped roughly 3-5 percentage points if the protocol was correct. Lean mass has either held flat or increased 1-2 kg. The chest, shoulders, and arms look measurably bigger because the underlying muscle has hypertrophied 3-8% and the overlying fat has thinned simultaneously — both effects amplify each other.
The week-12 photo also reveals the asymmetries you need to address in the next training block. Most lifters discover at week 12 that one side of their chest is noticeably ahead of the other, or that their left lat is more developed than their right, or that one quad is ahead of the other. This is normal and fixable; the photo just makes it visible. Block 2 of training (weeks 12-24) should bias volume toward the lagging side.
Week 16 — The Intermediate Milestone
For an intermediate starting at 15-18% body fat, week 16 is where the meaningful change registers in photos. The recomp window from 15% to 12% is the slowest visible-change phase in the entire recomp spectrum, because the absolute fat losses are small (3-4 kg over 16 weeks) and the muscle gains are similarly small (1-2 kg). The photo change is real but subtle — most clearly seen in the lower-abdominal region, the serratus anterior, and the upper-pectoral fat layer.
Intermediates running through this phase often get frustrated and conclude the protocol is not working, when in fact it is working at the rate the physiology allows. Helms 2014's framing here is the corrective: at lower body-fat starting points, the body resists further fat loss harder, raises hunger and cortisol more, and slows lean-mass gain in parallel. The 16-week intermediate transformation is real but quiet.
Week 24 — The Advanced Transformation
The 24-week mark is where lifters who started lean (10-12% body fat) and who have been training seriously for 2+ years see a photo-visible transformation. The fat loss is small (1-2 kg over six months) but the muscle gain (2-4 kg if the protocol and recovery are tight) reshapes the silhouette: shoulders measurably wider, chest measurably fuller, arms 1-2 cm larger in circumference. The waist barely moves at this body-fat starting point.
At this point, the recomp protocol is functionally a slow lean-mass-driven bulk with strict body-fat ceiling enforcement. The math from the recomp timelines piece caps natural hypertrophy at about 0.5-1.0% bodyweight per month for advanced lifters — so a 90 kg advanced lifter gaining 3 kg of muscle in 24 weeks is at the upper bound of what the physiology permits.
Reading the Photo Against the Scale and the Tape Measure
The three signals — photos, scale, tape measure — converge in different combinations to tell you what's happening. The four common patterns:
| Photo change | Scale change | Waist change | What it means |
|---|---|---|---|
| Visible improvement | Flat (±0.5 kg) | Down 1-3 cm | Textbook recomp — fat down, muscle up, net weight unchanged |
| Visible improvement | Down 1-2 kg | Down 2-4 cm | Recomp tilted toward cut — slightly too aggressive deficit, increase protein |
| Visible improvement | Up 1-2 kg | Flat or +0.5 cm | Recomp tilted toward lean bulk — fine if intentional, check body fat % monthly |
| No visible change | Down 1-2 kg | Down 1-2 cm | Muscle is being lost alongside fat — protein and training intensity are too low |
The fourth row is the failure mode to watch for. If the scale is moving down but the photos do not look better, you are losing muscle and fat at roughly the same rate, which is a cut, not a recomp. The fix is to increase protein to the upper end of 2.4-2.8 g/kg lean mass, increase training intensity (RPE 8+ on hypertrophy sets), and reduce the calorie deficit by 100-200 kcal.
Common Photo Mistakes That Mask Progress
1. Changing the lighting between sessions
Most lifters take the baseline photos in their best-lit room and the week-4 photos wherever they happen to be when they remember. The lighting drift is the single biggest source of false comparison. Pick one room, one time of day, one lighting setup. Use a piece of tape to mark where you stand and where the phone goes.
2. Comparing flexed photos to relaxed photos
A relaxed week-0 photo compared to a flexed week-4 photo will always look like progress, even if nothing has changed. Compare relaxed-to-relaxed. The flexed-to-flexed pair is a separate comparison.
3. Wearing different clothes
The waistband of your shorts changes how the abdominal region looks. The thickness of your t-shirt changes how the shoulders look. Wear the same clothing item across photo sessions — most physique coaches recommend a thin pair of shorts and either shirtless or a thin athletic top, and that is it.
4. Taking photos after a cheat meal or after fasting too long
Both produce misleading images. A cheat meal the night before adds 1-2 kg of water and food volume that the photo captures. A 16-hour fast depletes glycogen and produces a flat, smaller-looking image. Standardize on a normal eating day.
What to Do With the Photos After You Take Them
Pair each photo session with the matching numbers: bodyweight, waist circumference, hip circumference, and (every 4 weeks) body fat percentage from a skinfold calculation. Store the photos in a date-stamped folder. Every 4 weeks, do a side-by-side comparison: week 0 vs week 4, week 4 vs week 8, week 8 vs week 12. The two-step comparison (current vs the photo right before) catches subtle drift; the long-step comparison (current vs week 0) catches the big picture.
Most lifters get demotivated mid-recomp because they look at themselves daily in the mirror, where no change is visible day-to-day, and conclude nothing is happening. The week-0-vs-week-8 photo pair is the most powerful psychological tool in the recomp toolkit. It is also the one most lifters never look at, because they forgot to take the week-0 photo.
For the time-budget side of building a recomp routine — fitting 4 training sessions a week alongside a job and a commute — sketch your weekly income against your hours with the freelance rate calculator at PayScale Pro. The training-time-vs-earning tradeoff is the constraint most recomp protocols quietly run aground on.
The Bottom Line
Photos are the primary tracking tool for a body recomp, the scale is the secondary calibration, and waist circumference is the tertiary tiebreaker. Take photos every 14 days in identical conditions. Read week 4 as the first signal, week 8 as the compounding phase, week 12 as the beginner milestone, week 16 as the intermediate milestone, and week 24 as the advanced ceiling. Pair the photos with the protocol from the body recomp calculator, the protein math from the recomp protein guide, and the training structure from the recomp training split.
Get the photos right, and the recomp becomes a measurable process with a known feedback loop. Get them wrong, and you'll spend 12 weeks running a protocol that's working while believing it isn't.
Frequently Asked Questions
Calculate Your Recomp Macros
Plug your weight, body fat, and activity into the CalcFit body recomp calculator for personalized protein, carb, and fat targets.